Bridging Web 2.0 and web3
Building community for the decentralized web
I cut my teeth as an engineer in the social web, Web 2.0 era. I had a front-row seat when I joined VaynerMedia in 2012 for my first software engineering position, having begun my career in startup sales before teaching myself enough Ruby on Rails to be dangerous. I took over a project that let brands run contests or giveaways where users were required to like or follow. I made it mobile friendly, added Instagram when they released their OAuth API.
Some may think #brands ruined this era of the web. But it was probably inevitable that all the data we created in the participatory web would mined, turned into ads to sell us more junk, to track us around the web, to sell data about us to brokers. In some ways web3, the decentralized web, is a correction of where web 2.0 went wrong, vowing to not allow a few major corporations dictate how we connect or how we participate in commerce. But that doesn't mean we can't learn some things from Web 2.0, and even use tools that the social web created to build better communities, while still allowing those communities to be emergent and as anonymous as members wish to be.
Particularly in the NFT world, communities are primarily being built on Discord. Discord is of course a large, centralized corporation with a long Privacy Policy. They collect information about you when you interact with the service. Often times we choose convenience over privacy, and until a decentralized option exists with similar features and a usable UX, Discord seems like the best option to build relationships with a community of folks who are interested in a project.
As I started exploring the NFT space, I joined tons of project Discord servers and found some really neat tools that were being used for community building. Pretty much every server had a bot that would report secondary market transactions. Wanting to learn a bit more about the Discord API I built an open source bot for OpenSea, and I've helped a handful of community mods set it up in their servers. I also installed a few bots I'd seen elsewhere, things like levels for community participation. It's kinda meh to be honest. Collab.Land was quite cool though - it allowed me to set up roles based on the number of tokens a member owned. Using the !join command would cause the bot to DM you with a link. That link asked you to authenticate your wallet with their site, allowing Collab.Land to count the tokens and assign you a role. Neat!
One thing I wanted to do though was create roles based on more things that were really specific to CryptOrchids. I had seen the Sorare Discord server had roles for things like Unique Card Owner. Discord lets you assign privileges to roles, so if you held a Unique Card that put you in a rarefied club that could have access to closed channels. I wasn't sure how they did it, but I knew I'd have to replace Collab.Land with my own bot, so I dug a little deeper into the Discord API, and prepped some changes in the CryptOrchids dApp to support what I wanted to accomplish.
NextJS - perfect for dApps
The initial version of the website was a vanilla React SPA. A few things were bad, like the fact my meta tags for social shares couldn't be per-page. I also couldn't get MDX working with parcel, so my blog was in JSX, woof. And finally I had no API server. That felt fine to start, in a dApp we're mostly using other people's APIs to read blockchain data - either through Infura or via our TheGraph subgraph. But as I started to plan for the Discord roles project, it became clear that making these requests from a server would be the only secure way of doing it. Assigning roles to a user requires a Bot-authenticated request, and so I needed to use a Bot token rather than a user token. Leaking the bot token would mean anyone could call our bot to do dastardly things.
NextJS is a great React meta-framework for dApps - it's primarily a static site generator, but it also supports API "pages" that become little lamdba-like functions. We don't need to setup a database and make a full-fledged full-stack app, JAM stack for the win! It's also super handy to be able to very simply reuse code that was initially written for the client in your API pages. I was able to share a function that gets all of the tokens for a wallet address, and combines that with some constant data in the dApp, using it both from the frontend and now from an API route. This helped us lock down the role assignment so we are 100% confident that a Discord user and a wallet are owned by the same person entity. We use JWT based sessions and Discord OAuth to be certain about the Discord user, and we used a signed message to know that a wallet address belongs to the person operating the browser - since web3 runs in the browser, we need a way to confidently pass our API a wallet address in a manner that cannot be manipulated; signed messages help us accomplish thi.
Discord OAuth with NextAuth.js
I'm a big fan of NextAuth.js as an authentication framerwork for NextJS. It's secure by default, supports database-less authentication against third party providers powered by JWT-based sessions, and has a long list of supported providers, including Discord. I had previously contributed provider support for my OSS startup Osso, so I'm familiar with the internals and knew it would be super quick to get set up and running. I ended needing to make one small change to the Discord example code. NextAuth has great docs, so I won't duplicate them here, but here's the tiny bit of extra work we need to do beyond following their getting started guide.
The Discord provider doesn't add the user's Snowflake ID for Discord into the user profile that gets embedded in the session. So we need to write a tiny but of code using NextAuth's callbacks in order to grab this user ID and attach it to the session object. Here's the whole pages/api/[...nextAuth.ts]:
import NextAuth from 'next-auth';
import { JWT } from 'next-auth/jwt';
import Providers from 'next-auth/providers';

export default NextAuth({
  providers: [
    Providers.Discord({
      clientId: process.env.DISCORD_CLIENT_ID,
      clientSecret: process.env.DISCORD_CLIENT_SECRET,
    }),
  ],
  callbacks: {
    async session(session, userOrToken) {
      session.userId = (userOrToken as JWT)?.userId as string;
      return Promise.resolve(session);
    },
    async jwt(token, _user, account, _profile, _isNewUser) {
      if (account?.id) {
        token.userId = account.id;
      }
      return token;
    },
  },
  session: {
    jwt: true,
    maxAge: 365 * 24 * 60 * 60,
  },
});
With that in place, we can consume the session with a React hook, and utilize a function from NextAuth to kickoff the Discord auth -
import { signIn, useSession } from 'next-auth/client';
import React, { ReactElement } from 'react';
const Greenhouse = (): ReactElement => {
const [session] = useSession();
// ...
return (
<>
{ !session && (
<div>
<p>
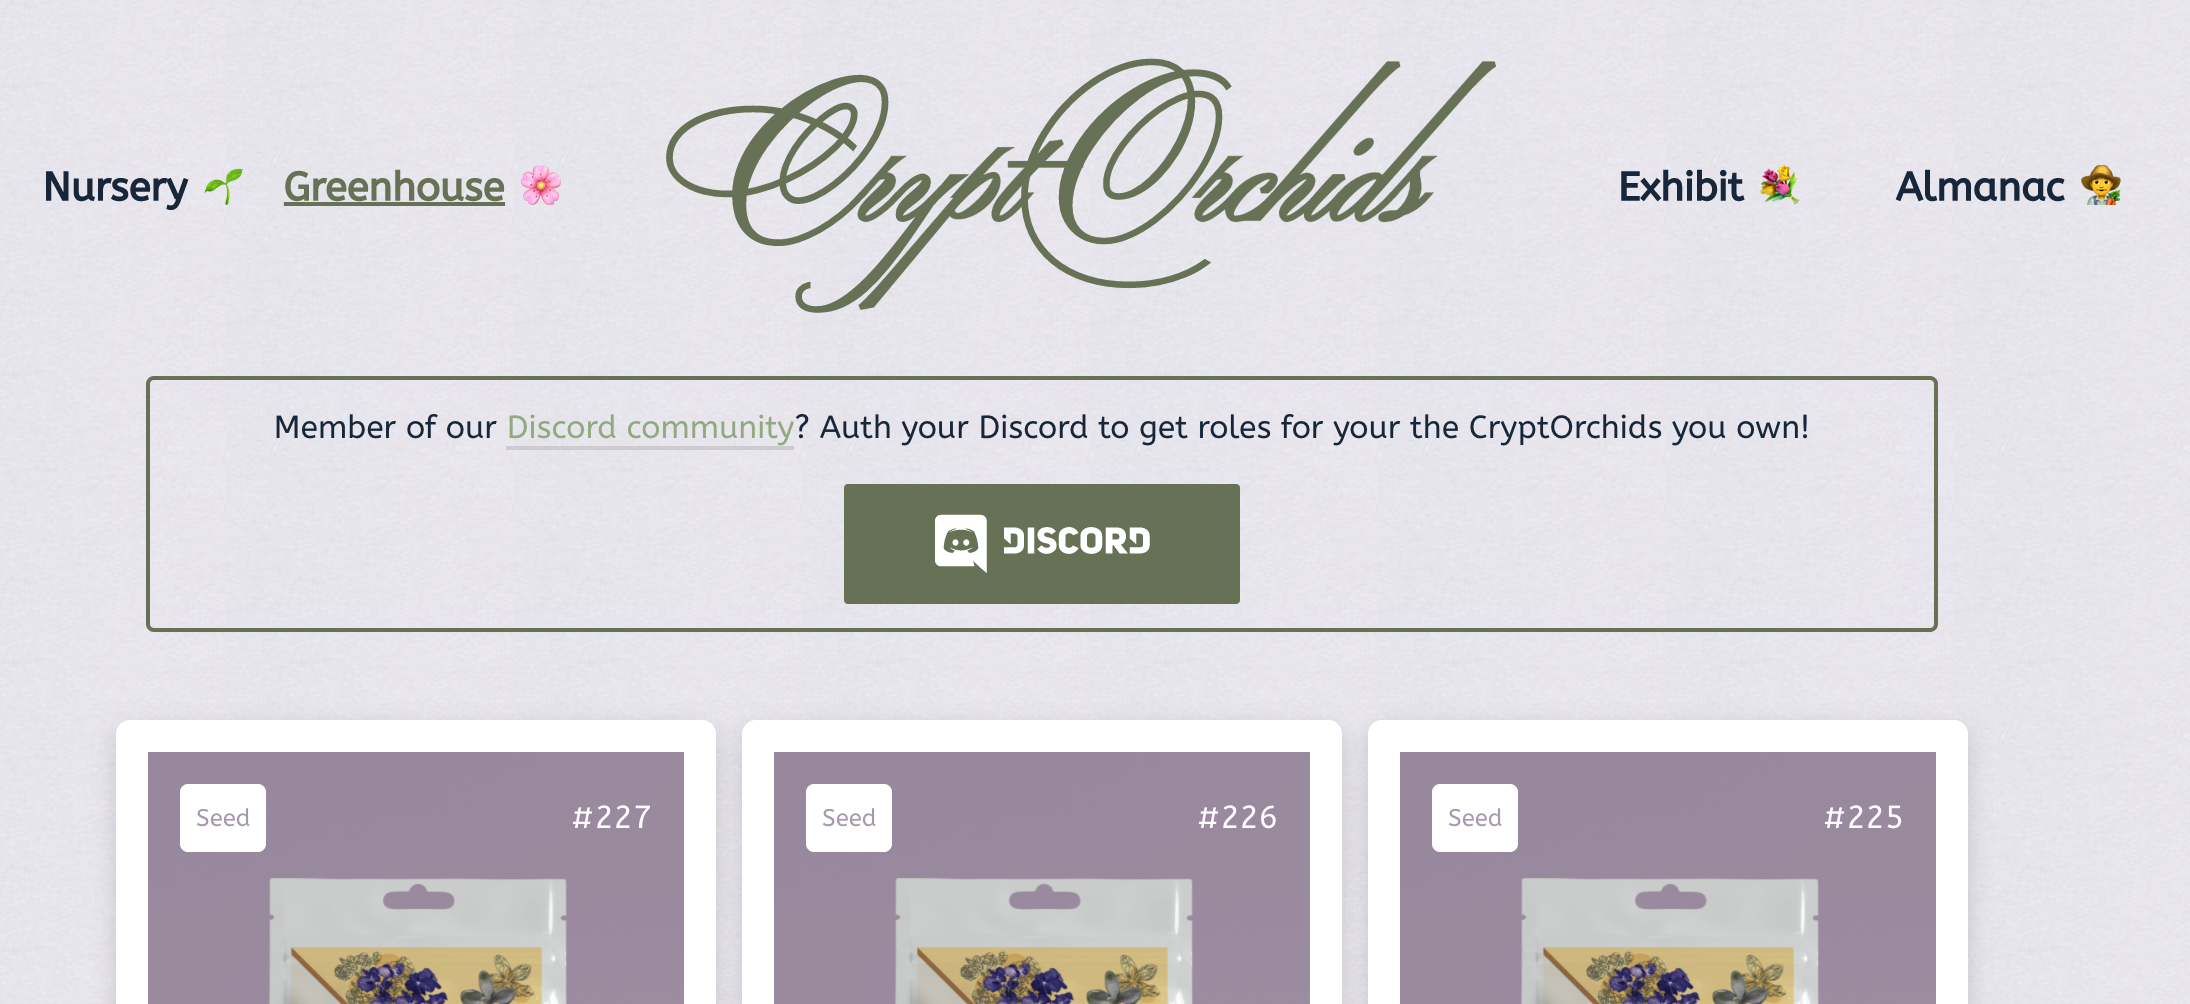
Member of our{' '}
<a
target="_blank"
rel="noreferrer"
href="https://discord.gg/ADFS4JAdTa"
>
Discord community
</a>
? Auth your Discord to get roles for your the CryptOrchids you own!
</p>
<Button onClick={() => signIn('discord')}>
Auth Discord
</Button>
</div>
)}
</>
)
Clicking that button sends the user to Discord, where they auth their account, and are sent back to our page. NextAuth handles the session and JWT creation. Now we have a session, and we don't really do anything with it on the client except show a different button if it is truthy -
  <>
    {session &&(
      <div>
        <p>To claim your roles, sign a message</p>
        <Button onClick={assignRoles}>
          Sign Message
        </Button>
      </div>
    )}
Before we jump into the assignRoles function, let's take a quick look at how our API uses the Discord user ID from the session. This is a new API "page" in NextJS, mines at pages/api/setRole.ts, and we'll just show an abridged version to talk about the Discord part for now.
All we need to do is use the getSession function provided by NextAuth. It reads the JWT off of the request and decodes it into the session payload. We grab our userId off the session, and can now make a request to find out what roles this user already has. Importantly, the user ID comes from the session, which we get from authenticating Discord. This API route does not accept a Discord ID, so the Discord user can't be spoofed. This approach also allows us to keep the bot token secret from the frontend, reading that secure value out of the build environment.
import { getSession } from 'next-auth/client';

export default async (req, res) => {
  const session = await getSession({ req });

  const existingRoles = await fetch(
    `https://discord.com/api/guilds/823342438768050187/members/${session.userId}`,
    {
      headers: {
        Authorization: `Bot ${process.env.DISCORD_BOT_TOKEN}`,
      },
    },
  )
    .then((response) => response.json())
    .then((data) => data.roles);
Signing messages with a user's wallet
Simplifying things a bit, web3 attaches itself to a browser window - an extension like metamask populates the browser window object with web3. When a user connects their wallet to your site, you can interact with their wallet through the frontend - you can for example fetch all of the tokens a user owns and display them. This doesn't go through your API server, but straight from the browser to the JSON RPC like Infura.
We need the wallet address for a user in our API though in order to keep things secure. Of course when dealing with security issues it makes a lot of sense to consider attack vectors - it truly does not matter all that much if someone assigns themself a role they shouldn't have access to, but I also like to put my best security foot forward for the science, and especially if I'm blogging about something I want to do it the right way.
So we want just grab the wallet ID and pass it to our API - that would allow any user to go find a wallet with a Legendary CryptOrchid and submit a request to the API with that address, granting themselves the Legendary Grower role. We might do giveaways or tell our Old Macdonalds (our role for OG growers) things before the rest of the community, so there is some desire to keep things secure.
Instead what we need to do is have the user sign a message. This takes a string that we come up with ("Claim Discord Roles"), and allows the user to sign that message with their wallet. Since we know the message, we can post the signed value to the API, and then use "Claim Discord Roles" to recover the wallet address that signed the message.
On the client, requesting to sign a message can look a little something like this. The signMessage is async as it requires user interaction to click the Sign button in metamask. Once we have the signed message, we can POST that to our API route.
  const { account, library } = useWeb3React();

  const assignRoles = async () => {
    const signer = library.getSigner();

    const sig = await signer.signMessage('Claiming Discord Roles', account);


    return fetch('/api/setRole', {
      body: JSON.stringify({
        sig,
      }),
      method: 'POST',
    }).then((response) => {
      return response.json();
    });
  }
On the API route, now we will also have supreme confidence that the wallet we are going to use is owned by the person using the website, and we already know the Discord account is owned by the person using the website, so we can now use the Discord API to assign and remove roles based on token ownership. Back in our setRole api page, we can decode the signed message to get the account, and then we can use the wallet address to now call Infura from the API route to find out what tokens the user owns, which we'll leave out here for brevity:
import { Contract, providers, utils } from 'ethers';
import { getSession } from 'next-auth/client';

import { CryptOrchidsABI } from '~abi/abis';
import rolePicker from '~utils/rolePicker';

export default async (req, res) => {
  const session = await getSession({ req });
  const { sig } = JSON.parse(req.body);
  const address = utils.verifyMessage('Claiming Discord Roles', sig);
  const ownedTokens = await fetchOwned(address);
  const newRoles = rolePicker(ownedTokens);

  const existingRoles = await fetch(
    `https://discord.com/api/guilds/823342438768050187/members/${session.userId}`,
    {
      headers: {
        Authorization: `Bot ${process.env.DISCORD_BOT_TOKEN}`,
      },
    },
  )
    .then((response) => response.json())
    .then((data) => data.roles);

  const addRoles = newRoles.filter(
    (roleId: string) => !existingRoles.includes(roleId),
  );
  const removeRoles = existingRoles.filter(
    (roleId: string) => !newRoles.includes(roleId),
  );

  const result = await Promise.all([
    addRoles.map(async (roleId) => {
      return fetch(
        `https://discord.com/api/guilds/823342438768050187/members/${session.userId}/roles/${roleId}`,
        {
          method: 'PUT',
          headers: {
            Authorization: `Bot ${process.env.DISCORD_BOT_TOKEN}`,
          },
        },
      );
    }),
    removeRoles.map(async (roleId) => {
      return fetch(
        `https://discord.com/api/guilds/823342438768050187/members/${session.userId}/roles/${roleId}`,
        {
          method: 'DELETE',
          headers: {
            Authorization: `Bot ${process.env.DISCORD_BOT_TOKEN}`,
          },
        },
      );
    }),
  ]).catch((error) => {
    return {
      statusCode: 200,
      body: JSON.stringify(error),
    };
  });

  res.send(JSON.stringify({ result }));
};
The really fun part is the rolePicker function. Here's where you get to have some fun, coming up with creative roles based on various aspects of your collection's tokens and project specific metadata. We do roles for planted flower rarity, for owning lots of tokens, and for planting before April 20th, but the possibilities are endless! I had already created these roles in the server and copied their Snowflake ID from the Discord UI.
  const rareRoles = {
    Seed: '829434872284184649',
    Common: '829316873593028618',
    Uncommon: '829317249839005716',
    Rare: '829317495038804040',
    'Super Rare': '829317604258086935',
    Legendary: '829317611601920043',
  };

  export default function rolePicker(ownedTokens: OrchidItem[]): string[] {
    const roles = [];

    if (ownedTokens.length === 0) {
      return roles;
    }

    if (ownedTokens.length >= 10) {
      roles.push('830412497479139389'); // flower shop
    }

    if (ownedTokens.length >= 20) {
      roles.push('830412704925351936'); // factory farm
    }

    const ordered = ownedTokens.sort((a, b) =>
      a.plantedAt > b.plantedAt ? -1 : 1,
    );

    if (ordered[0].plantedAt && ordered[0].plantedAt < new Date(2021, 4, 20)) {
      roles.push('831668818702893077'); // Old MacDonald
    }

    const flowers = ordered.filter((orchid) => orchid.stage !== 'DEAD');

    const flowerRoles = flowers.map((flower) => rareRoles[flower.level]);

    return [...new Set([...roles, ...flowerRoles])];
  }
Shipit
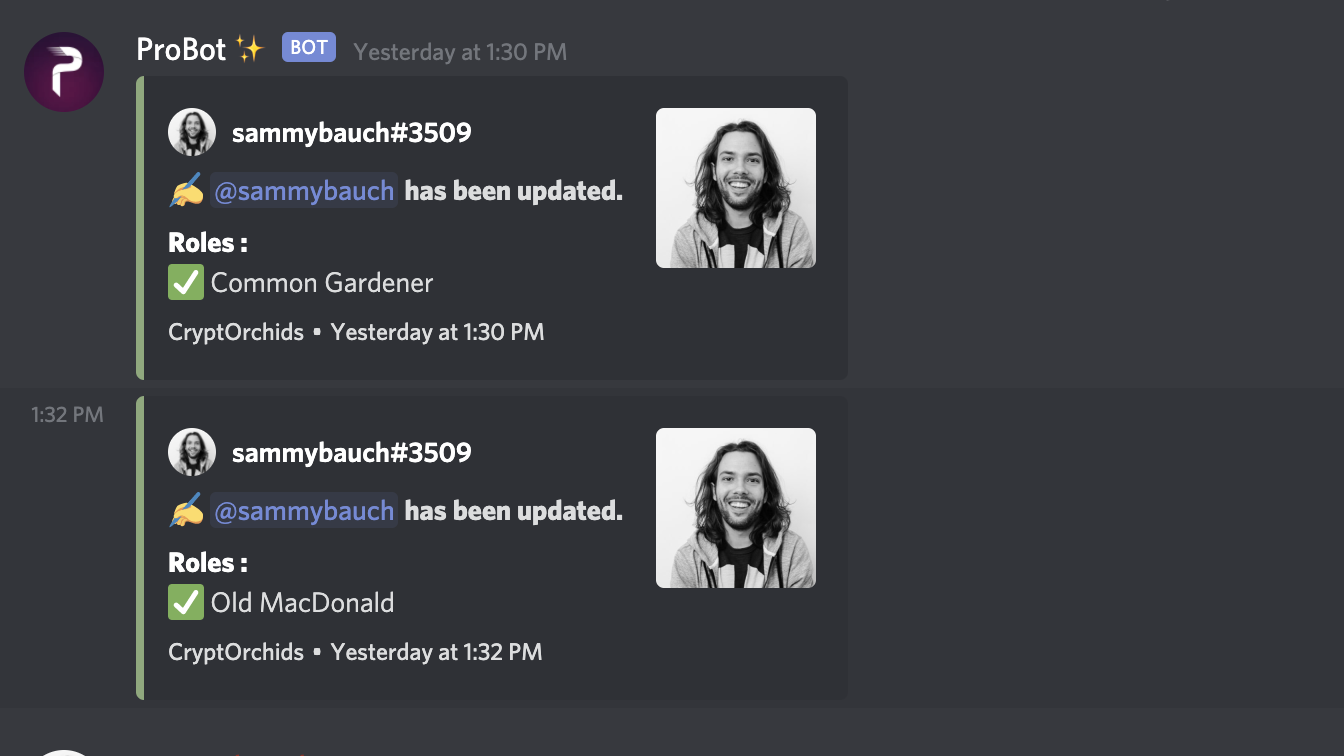
With that code all in place we're ready to go live! You do of course need to also set up a Discord app in the developer portal, and add a bot with permission to manage rolls, but that's a bit outside scope here. One fun thing I also did was add Probot which has a nice feature to post when community members are assigned new roles. It's been fun to see people get roles right as they plant seeds, and while not many community members have utilized this funcitonalitry just yet, I suspect they won't be able to ignore it when they come back for watering!